| OkOb.net | ||||||||
| Registration | Projects |
| RepRap X2V3 | RepRap X2 | Virtual Display Image Viewer for PDA | XUL Jabber Client | Voice Sensitive Screen Saver |
Virtual Display Image Viewer
| Overview&News | Download&Installation | Usage&Screenshots | To-Do&Change-log | Sources |
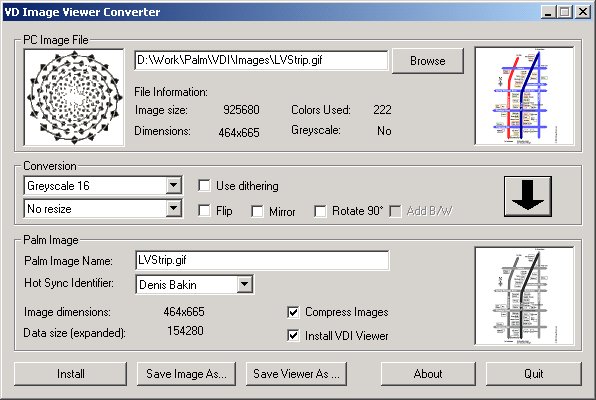
After a successful installation start the application by clicking on the application icon (or any other way you like). The application window will appear. Make sure to select Install VDI Viewer the first time you install an image to your Palm device. This ensures that the Palm viewer application will also be scheduled for the installation. Select or drag and drop an image file from windows file explorer or MS Internet explorer to the PC Image File area of the VDIVC application window, click the convert (down arrow) button and then, after selecting your sync user name, the install button. You can install multiple images to your Palm device. If you wish, instead of installing, you can save the converted image(s) (PDB) and the viewer application (PRC) as ordinary files on your system.
The files prepared by the converter are transferred to your Palm device the next time HotSync operation is performed. The Palm viewer application will be available as "VDI" in your launcher. When you tap on the viewer icon the first time, it starts and automatically loads the first image found.
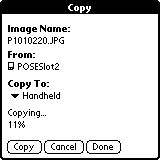
If you are using the viewer of v1.6 or later and your Palm supports expansion cards (like Sony memory stick or SD memory cards), you may save the converted images to the /PALM/Launcher/ directory on the card. The viewer will allow you to work with the images pretty much the same way you work with the images installed to the main memory (open, delete, get image info ...). It will also allow you to copy images between the main memory and the expansion cards. Note, that even though images are stored on the expansion card when you open one of them you have to have enough main memory to load it. Also beware that loading from an expansion card can take time. The viewer will start automatically when the card is inserted if you copy it to: /PALM/start.prc file on the expansion card.
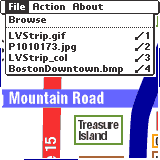
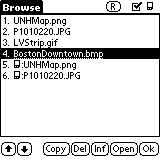
Use the Browse menu entry, or keys 1,2,3...9, or keys q,w,e ...o to choose another installed image to view. The menu can be activated by tapping on the menu icon in the lower left corner of the scribbling area or by pressing 0, p or any numeric key that does not have an image assigned. You can use the Browse screen to rearrange images. The top 9 images in the list are accessible through the menu and/or keyboard. The images in the list that have a "card" icon in front of them reside on an expansion card. You can disable the expansion card scanning by un-checking the checkbox in the upper right corner of the Browse screen. The "R" button besides the box refreshes the image list. The Copy button can be used to copy an image selected to/from the expansion card.
The navigation over an image is performed by tapping and holding the stylus near the border of the screen in the desired direction. The close to the border you tap, the faster screen moves. The frame around the screen identifies the relative (to the image) window position and size. In order to zoom in or out draw the controlling gestures (see screenshots below) on the screen. The viewer will try to center on the position you started drawing the gesture from after the zoom level is changed. You can also use keys a and z (or v) for zooming. The x key can be used for fast switching to maximum available zoom level and back.
The viewers of version 1.7 and higher support compression. The image data get compressed during creation of the PDB image databases due to "Install" or "Save Image As..." operations. The "Compress Images" checkbox in the "Palm Image" group of controls enables or disables the feature. The compression is based on ZLIB library v.1.1.4. It provides quite nice compression level for maps, diagrams (10-15 times) but not for photos. Note, that compression slows down image opening, requires memory space for decompressed image data and working buffers, therefore it only makes sense to use compression if you keep more then one image on your handheld.
Sublaunching
The viewer of version 1.7b and higher can be passed instructions which image to open, at what initial position and zoom level. The vdlaunch example demonstrates how an application can call VD Image Viewer and get the control back after user exits the viewer. Note that additional handling might be required depending on your application memory usage, UI features etc.
Command Line Interface
The converter of version 1.8a can be passed command line
parameters. Below is the description of the CLI Interface.
| Usage: | vdivc.exe <input-path> [-d] -c <type> [-b] [-e] [-s <scale>] [-f] [-m] [-r] [-i <palm-user-id>|-o <output-path>] [-z] [-n <name>]> [-l <log-name>] |
|
| or | ||
| vdivc.exe -v <pathname> [-l <log-name>] | ||
| or | ||
| vdivc.exe <file-name> |
| <input-path> | Path to the input file(s) (can include mask for batch processing i.e. when "-c" is present). | |
| -d | Traverse subfolders. | |
| -c <type> | Convert input image file(s). Following conversion types are supported: 0 - "Greyscale 16" 1 - "Color 16" 2 - "Greyscale 256" 3 - "Color 256" 4 - "Color 64K" |
|
| -b | Assure presence of black and white colors in the output image palette (silently ignored if does not apply to the desired output image type). | |
| -e | Try to compensate for errors due to color reduction in the output image (silently ignored if not supported for the desired output image type). | |
| -s <scale> | Rescale the image.
The |
|
| -f | Flip image upside down. | |
| -m | Mirror image. | |
| -r | Rotate image 90 degrees clockwise. | |
| -i <palm-user-id> | Tells the application to schedule the converted image(s) for installation instead of saving them into a PDB file. The <palm-user-id> is case sensitive. | |
| -o <output-path> | Store the converted image(s) into |
|
| -z | Compress the output image data. | |
| -n <name> | Set database name for converted image(s) to the specified string (up to 32 characters). The name is set to the first 32 bytes of input filename by default. | |
| -l <log-name> | Create processing log file. | |
| -v <pathname> | Extract the viewer PRC file and save into the <pathname>. |
PDA viewer application:
| 256 color image
|
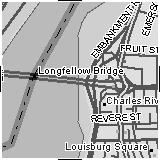
Las Vegas Strip
|
Image Copy
|
||
| Browse screen
|
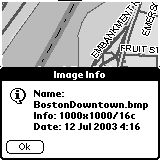
Boston Downtown
|
Active Image Info
|
Converter main window: